You're creating slides for tomorrow's calculus lecture. You need to show 15 derivative examples with step-by-step work. You spend an hour clicking through equation editors, aligning text boxes, and formatting equations.
Then you realize: slide 7 has a typo in the equation. You have to recreate it from scratch.
There's a faster way that doesn't require clicking through menus or recreating equations.
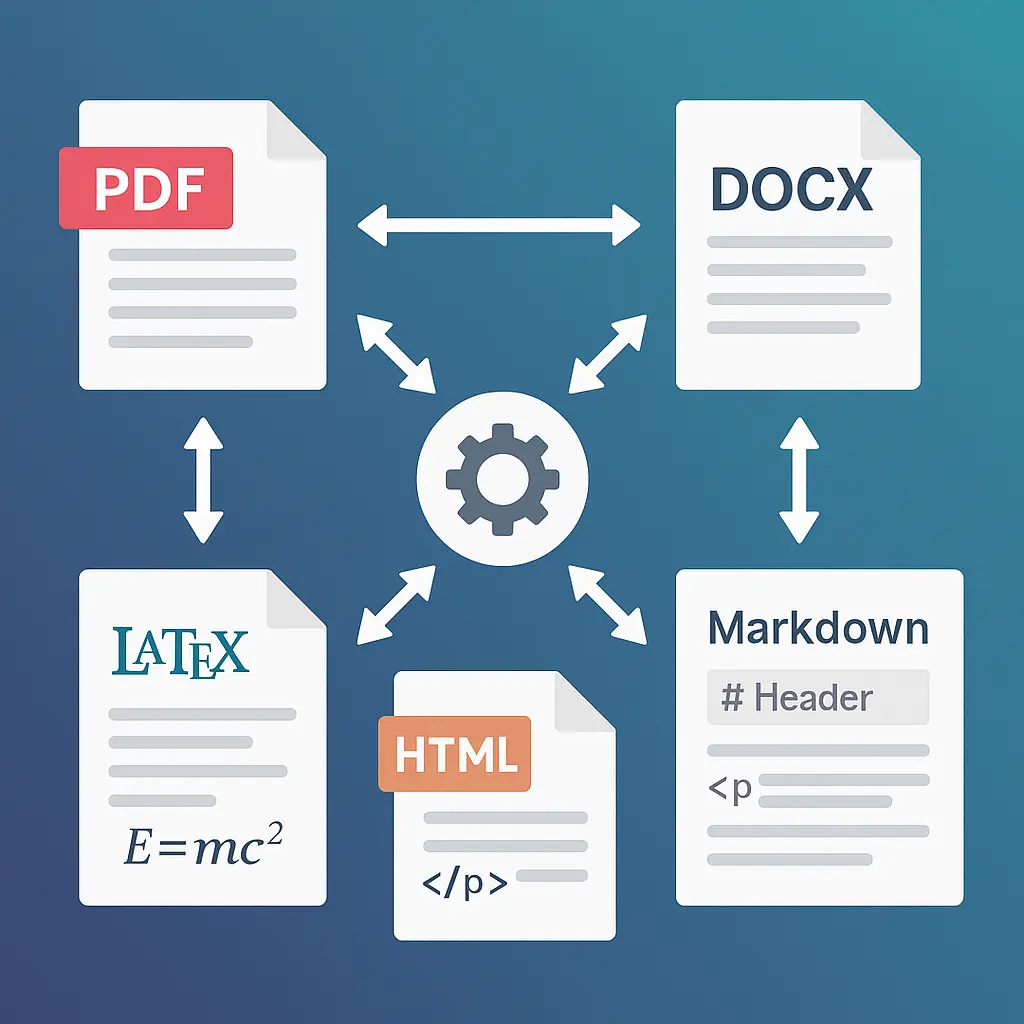
This guide shows you how to create professional math presentations in Google Slides using voice input (dictate equations hands-free), handwriting recognition (write naturally on tablets), and OCR (extract equations from textbook slides or photos). We'll cover workflows for teachers creating lessons and students building project presentations.
💡 Pro tip: Voice input is fastest for creating new slides from scratch. OCR is fastest when adapting existing materials. Handwriting works great for live presentations on tablets.
Math Equations in Presentations: The Challenge
Creating math-heavy presentations is time-consuming because:
Standard tools are slow:
- Equation editors require clicking symbols one by one
- LaTeX editors exist outside Slides (copy-paste workflow)
- PowerPoint equations don't transfer cleanly to Slides
- No voice input or handwriting support
Common presentation scenarios:
Teachers preparing lectures:
- 20-40 slides per lecture
- Multiple equations per slide
- Step-by-step derivations
- Real-time edits during class
Students creating projects:
- Math/science presentations
- Research poster content
- Homework submission (some classes use Slides)
- Study guide presentations
The problem: Existing tools assume you're typing at a computer. But presentations often happen in dynamic environments—tablets, touchscreens, even live annotation during lectures.
Insert Equations with Voice Input (Hands-Free)
MathPad brings Speech-to-LaTeX directly into Google Slides sidebar. Dictate equations while preparing slides, during live presentations, or when your hands are occupied.
How it works:
- Open MathPad sidebar in Google Slides (Add-ons → MathPad → Open Sidebar)
- Click microphone icon
- Speak your equation naturally
- LaTeX appears in real-time
- Insert directly onto slide
Example dictations:
You say: "f of x equals x squared minus 3x plus 2"
MathPad converts to: f(x) = x^2 - 3x + 2
You say: "The integral from 0 to pi of sine x d x"
MathPad converts to: \int_{0}^{\pi} \sin(x) \, dx
You say: "The derivative of e to the x squared"
MathPad converts to: \frac{d}{dx} e^{x^2} = 2x e^{x^2}
When voice input excels:
Scenario 1: Live lecture adjustments
- Student asks: "What if the coefficient was 5 instead of 3?"
- Dictate new equation
- Insert on new slide
- Continue lecture seamlessly
Scenario 2: Creating slide deck from notes
- You have handwritten notes
- Read equations aloud while looking at notes
- Voice input types them for you
- Faster than manual typing
Scenario 3: Tablet presentation mode
- Presenting from tablet without keyboard
- Need to add example problem
- Use voice input without breaking flow
- No laptop required
Scenario 4: Accessibility
- Mobility limitations make typing difficult
- Voice input enables independent slide creation
- Also benefits presenters with RSI or hand injuries
Voice commands for presentations:
Beyond basic math, presentation-specific commands:
- "New slide with..." – Creates slide and adds equation
- "Insert at top/bottom/center" – Positioning control
- "Larger font" / "Smaller font" – Size adjustment
- "Duplicate this" – Copy equation for variations
Tips for clear dictation in presentations:
- Speak punctuation: "open parenthesis", "comma", "period"
- Use natural phrasing: "x squared" not "x to the power of 2"
- Pause between terms: Helps recognition accuracy
- Preview before insert: Quick check catches any misrecognitions
- Edit as needed: Voice gets you 90% there, quick edits finish
Handwriting Recognition for Natural Input
Tablets and touchscreen laptops are increasingly popular for presentations. MathPad's Digital Ink feature lets you write equations naturally with a stylus or finger.
How it works:
- Open handwriting pad in MathPad sidebar
- Write equation with stylus or finger
- Real-time conversion to LaTeX
- Insert onto slide at cursor position
Hardware that works great:
- iPad with Apple Pencil (using Chrome browser)
- Microsoft Surface tablets with stylus
- Chromebook with touchscreen and stylus
- Android tablets with active pen
- Any touchscreen (finger works, stylus better)
What you can handwrite:
- Basic algebra: variables, operations, parentheses
- Fractions: Draw fraction bar, write numerator above, denominator below
- Exponents and subscripts: Write superscript/subscript naturally
- Greek letters: α, β, θ, π (recognized from shape)
- Calculus: ∫, ∑, lim, derivatives
- Matrices: Draw brackets, write elements
Recognition accuracy:
- Excellent: Clean, clear writing with stylus
- Good: Finger writing with spacing between symbols
- Fair: Rushed writing or very small symbols
Live presentation workflow:
Scenario: Teaching trigonometry, student asks for extra example
Traditional approach:
- Exit presentation mode
- Create new slide
- Click through equation editor
- Re-enter presentation mode
- Time: 2-3 minutes, flow broken
With handwriting:
- Stay in presentation mode
- Open MathPad sidebar (stays in presenter view)
- Handwrite equation: $\sin^2\theta + \cos^2\theta = 1$
- Insert onto slide
- Continue teaching
- Time: 20 seconds, flow maintained
Tips for better handwriting recognition:
- Write clearly: Take your time, especially during live demos
- One symbol at a time: Complete each character before next
- Use tablet mode: Lay device flat like paper
- Practice common symbols: α, θ, ∫, Σ get easier with repetition
- Review before insert: LaTeX preview shows recognition quality
💡 Pro tip: For live presentations, create a "scratch slide" at the end of your deck. Handwrite equations there during Q&A, then copy to relevant slides later.
✨ Try handwriting in your presentations Install MathPad for Slides →
OCR from Lecture Slides and Textbooks
The fastest way to add equations to slides? Extract them from existing materials using OCR.
Common scenarios:
Adapting textbook content for lectures:
- Photo textbook page with theorem
- OCR extracts equation
- Insert into your lecture slide
- Add your own explanation around it
Converting old PowerPoint slides:
- Screenshot equation from PPT
- OCR converts to LaTeX
- Insert clean, scalable version in Slides
- Now fully editable in Slides
Digitizing whiteboard content:
- Photo whiteboard after lecture
- OCR extracts all equations
- Create slide deck from lecture notes
- Share with students who missed class
Creating study materials from lectures:
- Screenshot professor's slides
- OCR extracts equations
- Build personal study guide
- Now searchable and editable
How OCR works in Slides:
Upload/capture image:
- Take photo with phone
- Upload screenshot
- Paste image from clipboard
- Screen capture from video
OCR processes image:
- Identifies math regions
- Extracts equations
- Converts to LaTeX
- Preview shows results
Insert onto slide:
- Single equation: Insert at cursor
- Multiple equations: Multi-snip mode (choose which ones)
- Formatted text: Preserves layout
OCR accuracy by source:
| Source Type | Accuracy | Best For |
|---|---|---|
| Printed textbooks | 95-98% | Creating lecture slides from curriculum |
| Typed documents | 95-98% | Converting existing digital materials |
| Clean handwriting | 85-92% | Digitizing student work examples |
| Whiteboard photos | 80-90% | Capturing live lecture content |
| Messy handwriting | 70-85% | Requires manual review/correction |
Multi-snip mode for presentations:
Scenario: Textbook page has 5 example problems you want to discuss.
Without multi-snip:
- Photo problem 1 → OCR → Insert → Repeat 5 times
- Time: 5-7 minutes
With multi-snip:
- Photo entire page once
- Draw boxes around each of 5 problems
- OCR processes all at once
- Insert all 5 onto separate slides
- Time: 60 seconds
Multi-snip workflow:
- Upload image (textbook page, worksheet, slide)
- Enable multi-snip mode
- Click and drag to select regions (as many as you want)
- Each region gets OCR'd independently
- Preview all extractions
- Insert all at once or selectively
Perfect for:
- Creating problem sets on slides (1 problem per slide)
- Extracting theorems from multiple textbook pages
- Converting lecture notes to presentation
- Building quiz slides from worksheets
Insert Equations Directly on Slides
Once you've created equations (voice, handwriting, or OCR), inserting them onto slides is simple.
Insertion methods:
1. Insert as PNG image:
- High-quality rendered equation
- Scalable (vector-based rendering)
- Positions like any image in Slides
- Drag to resize, no quality loss
2. Insert as text (LaTeX in text box):
- Fully editable text
- Copy-paste friendly
- Useful for sharing source LaTeX
- Students can copy for their notes
Positioning options:
During insertion:
- Center of slide
- Top/bottom of slide
- Next to selected element
- Cursor position (in text box)
After insertion:
- Drag to reposition
- Resize by dragging corners
- Align with other elements (Slides alignment tools)
- Group with related elements
Slide layout patterns:
Pattern 1: Title + Equation + Steps
[Slide Title: Quadratic Formula]

[Large centered equation]

[Bullet points showing derivation steps]
Pattern 2: Side-by-side comparison
[Slide Title: Method Comparison]

[Equation 1]          [Equation 2]
(left half)           (right half)

[Pros/Cons below each]
Pattern 3: Step-by-step derivation
[Slide Title: Deriving the Formula]

Step 1: [Equation 1]
         ↓ [explanation]
Step 2: [Equation 2]
         ↓ [explanation]
Step 3: [Equation 3]
Pattern 4: Problem + Solution
[Slide Title: Example Problem]

Problem: [Equation stating problem]

[Work shown with multiple equations]

Answer: [Final result highlighted]
Formatting tips:
Font size: Equations should be readable from back of room
- Classroom: 24-32pt
- Lecture hall: 36-48pt
- Conference: 40-54pt
Contrast: Dark equations on light backgrounds (or vice versa)
- Avoid low-contrast combinations
- Test visibility in actual presentation environment
Spacing: Give equations room to breathe
- Don't cram multiple equations too close
- White space improves readability
Alignment: Use Slides' alignment tools
- Center important equations
- Left-align for step-by-step work
- Right-align for results/answers
Consistency: Use same style throughout
- Same font size for same types of equations
- Consistent positioning
- Similar spacing patterns
Load and Edit Selected Formulas
Already have equations on your slides? Load them back into MathPad for editing.
How it works:
- Select equation image on slide
- Click "Load Selected Formula" in MathPad sidebar
- Equation appears in editor with full LaTeX source
- Edit as needed
- Re-insert (replaces selected equation)
When to use:
Fixing typos:
- Spot error in slide during review
- Load → Fix → Re-insert
- No need to recreate from scratch
Creating variations:
- Have $f(x) = x^2$, need $g(x) = x^3$
- Load → Edit exponent → Insert as new equation
- Faster than creating from scratch
Updating examples:
- Last year's slides used different numbers
- Load → Change numbers → Re-insert
- Maintains formatting and positioning
Adapting for different classes:
- AP Calculus vs Regular Calculus
- Load equations → Simplify → Re-insert
- Same slides, adjusted difficulty
Extract LaTeX source:
- Want to share LaTeX with students
- Load equation → Copy LaTeX → Share
- Students can recreate in their notes
Limitations:
Works with:
- ✅ Equations inserted via MathPad (metadata stored)
- ✅ Images with LaTeX in alt-text
- ✅ Some images with embedded LaTeX
Doesn't work with:
- ❌ Google Slides' built-in equation editor output
- ❌ Screenshots without metadata
- ❌ Equations from other tools (unless metadata present)
Workaround for non-MathPad equations:
- Use OCR to extract from selected image
- Same result, different method
Creating Professional Math Presentations
Beyond just inserting equations, here are best practices for presentation design:
Slide structure for math lessons:
Introduction slide:
- Lesson objective
- Key concepts covered
- Prerequisites reminder
Definition slides:
- Clear, concise definition
- Important terms highlighted
- Example included
Theorem/Formula slides:
- Statement of theorem
- Conditions/assumptions
- Key equation displayed prominently
Derivation slides:
- Step-by-step progression
- One major step per slide
- Reasoning explained between steps
Example problem slides:
- Problem statement (clear, readable)
- Work shown step-by-step (multi-slide if needed)
- Final answer highlighted
- Common mistakes to avoid
Practice problem slides:
- Problems for class to attempt
- Countdown timer (optional)
- Solutions on following slides
Summary slide:
- Key takeaways
- Important formulas to remember
- Preview of next lesson
Presentation delivery tips:
For live lectures:
- Use presenter view: See notes, students see equations
- Annotate with pointer: Highlight parts of equations during explanation
- Have "scratch slide": Add examples spontaneously via handwriting
- Export to PDF: Backup if internet drops
For recorded videos:
- Larger fonts: Equations visible even on phone screens
- Clear pronunciation: Students learning from video need clarity
- Pause after equations: Give time to copy into notes
- Provide slide deck: Upload PDF so students can follow along
For student presentations:
- Practice timing: Know which slides to expand on
- Explain notation: Don't assume audience knows all symbols
- Use animations: Reveal equations step-by-step (Slides animations)
- Prepare backup: Have printed handouts of key equations
Best Practices for Math Slides
Design principles:
1. One concept per slide:
- Don't cram multiple theorems on one slide
- Each major equation gets its own slide
- Simplifies explanation and improves retention
2. Progressive disclosure:
- Use Slides' animation features
- Show problem first, solution after
- Build equations piece by piece for derivations
3. Visual hierarchy:
- Most important equation: Largest, centered
- Supporting equations: Smaller, to side
- Explanatory text: Even smaller, below
4. Color coding:
- Use color to highlight related terms
- Example: Same color for terms that cancel out
- Consistent color scheme throughout
5. Real-world connections:
- Include application examples
- Show graphs alongside equations
- Use concrete numbers in examples
Accessibility considerations:
- Font size: Minimum 24pt, prefer 32pt+
- High contrast: Dark on light or light on dark
- Alt text: Add descriptions for screen readers
- Spoken explanations: Don't rely only on visual equations
- Provide notes: Share text version with LaTeX for assistive tech
Common mistakes to avoid:
❌ Too much on one slide:
- Cluttered slides are hard to follow
- Audience reads ahead instead of listening
❌ Tiny equations:
- Back row can't read
- Students can't copy into notes accurately
❌ No context:
- Equations floating without explanation
- Show where formula comes from
❌ Rushing through derivations:
- Students need time to process steps
- Pause, explain reasoning, check understanding
❌ Inconsistent notation:
- Using $x$ sometimes, $t$ other times for same variable
- Confuses students
💡 Pro tip: Test your slides on a projector before presenting. What looks good on your laptop may be hard to read projected on a wall.
📸 Ready to create professional math slides? Install MathPad for Slides →
Frequently Asked Questions
How do I insert math equations in Google Slides?
Use MathPad addon to insert equations via voice input, handwriting, OCR, or typed LaTeX. Equations appear as high-quality images positioned anywhere on your slides.
Can I use voice input to create math slides hands-free?
Yes, MathPad's Speech-to-LaTeX feature lets you dictate equations naturally. Say "x squared plus 5" and it converts to $x^2 + 5$. Works in Slides sidebar.
How do I write equations by hand in Google Slides?
Open MathPad's handwriting pad in Slides sidebar, write with stylus or finger on touchscreen, and equations convert to LaTeX in real-time for insertion onto slides.
Can I extract equations from textbook slides or photos?
Yes, use MathPad's OCR feature to photo textbook pages, lecture slides, or whiteboard content. OCR extracts equations for insertion onto your Slides.
What's multi-snip mode for presentations?
Multi-snip lets you select multiple regions from one image (like a textbook page with several problems) and OCR them all at once. Perfect for creating problem sets on slides.
Can I edit equations already on my slides?
Yes, if equations were inserted via MathPad, select them and click "Load Selected Formula" to edit the LaTeX and re-insert. Works for equations with stored metadata.
How do I make math equations readable in presentations?
Use large font sizes (32pt+ for classrooms, 48pt+ for lecture halls), high contrast backgrounds, and test visibility on an actual projector before presenting.
Can students create math presentations in Google Slides?
Yes, all MathPad features work for students creating project presentations, homework submissions, or study guides. Same tools as teachers use.
Does this work on tablets for live presentations?
Yes, MathPad works on tablets (iPad, Surface, Chromebook) with handwriting support. Great for live annotation during presentations without needing a laptop.
Can I convert PowerPoint slides with equations to Google Slides?
Screenshot PowerPoint equations, use OCR to extract them, then insert into Google Slides. They'll be clean, scalable, and editable in the new format.
How do I share slide decks with students after class?
Share the Slides file directly (students can view equations), or export to PDF (printable handouts). If sharing LaTeX, use "Load Selected Formula" to get source code.
Is there a way to add equations during a live presentation?
Yes, use voice input or handwriting without exiting presentation mode. MathPad sidebar works in presenter view, so you can add examples during Q&A.
Related Topics
Continue learning:
- Math Equations in Google Docs → – Insert equations in documents
- Auto-Graded Quizzes in Forms → – Create quiz slides with answers
- Math by Voice → – Deep dive into speech-to-LaTeX
- Complete Workspace Guide → – Full ecosystem integration
- Math OCR Technology → – How OCR works behind the scenes
External resources:
Conclusion
Creating math presentations doesn't have to mean hours of clicking through equation editors. With MathPad's voice input, handwriting recognition, and OCR, you can:
Create equations three ways:
- Voice: Dictate equations hands-free while multitasking
- Handwriting: Write naturally on tablets and touchscreens
- OCR: Extract from textbooks, whiteboards, or existing slides
Insert and edit effortlessly:
- High-quality equations positioned anywhere on slides
- Load existing equations for quick edits
- Multi-snip for batch extraction
Present professionally:
- Live annotation during presentations
- Tablet-friendly for mobile presenting
- Consistent, readable math notation
Whether you're a teacher creating 40-slide lecture decks or a student building a 10-slide project presentation, MathPad makes math slides faster and better.
Ready to create professional math presentations? Install MathPad for Google Slides and try voice input, handwriting, and OCR today.
Have questions about math presentations? Contact our team or try MathPad free.